Showing posts with label VS Code. Show all posts

Thursday, May 25, 2023

Using VS Code over Samba on Mac

Updated 06/08/23 with some minor code edits to make sure dev server is mounted first and to ignore certain file patterns such as git files

The Problem

In my current job I am working on a very old codebase where the development has to be done on a dedicated dev server. For me that means using Samba on a MacBook. And from what I've read in various places, the Samba implementation on MacOS isn't always the best. For me, it is terribly slow and I have run into a couple of major issues that make development more difficult. The first issue is that I cannot use VS Code's built-in version control tools. I have tried changing various settings but it still doesn't work right. And the bigger issue is that because of the large number of files and the slowness of the connection, I cannot use the global find or easily pull up a file by name.

A Solution?

Microsoft has a solution for this. It's called VS Code Remote Development. I have not tried it but it sounds promising. The problem is that at my job, it could take weeks (months?) to convince the powers-that-be that it's needed and secure. It's just one of those times where I can write my own solution faster than waiting on management to debate the issue. So here's what I came up with.

My Solution

Based on this gist I found, I wrote my own code to keep my local codebase in sync with the dev server.

The first part was to create a bash script called devcodemon to watch for changes in my local code directory using fswatch. Then whenever a file changes, it passes that to a Node script to process it. (By the way, I should point out that both of these scripts are in my PATH.)

devcodemon
#!/bin/bash
is_mounted=$(mount | grep rsync-test | wc -l)
if [ $is_mounted -eq 0 ]
then
    echo "Dev server not mounted"
    exit 1
else
    dir2watch="$HOME/rsync-test"
    echo "Monitoring $dir2watch"
    fswatch $dir2watch | (while read line; do sync-file.js "$line"; done)
fi

The second script, sync-file.js checks to see if the file was updated or deleted. If it was the former, then it copies the file over to the dev server. If it's the latter, it removes the file from the dev server. The ora pacakge gives the CLI a nice UI: a spinner while the file is processing and a green check on success or a red X on failure. A Node.js tip here: in order to use this package, you need to set type to module in your package.json file. For more information on CommonJS modules vs ES modules, see this blog post.

sync-file.js
#!/usr/bin/env node
import { copyFileSync, existsSync, unlinkSync } from 'fs';
import ora from 'ora';

const basePath = `${process.env.HOME}/code/io-application-code`;
const destPath = `${process.env.HOME}/mounts/io-dev1`;

const ignorePatterns = [
    /^\/\.git/,
];

const src = process.argv[2];
const dst = src.replace(basePath, destPath);

(async () => {
    ignorePatterns.forEach(pattern => {
        const relativePath = src.replace(basePath, '');
        if (relativePath.match(pattern)) {
            process.exit();
        }
    });

    const spinner = ora({
        text: `Synching ${src}...`,
        color: 'green',
        spinner: 'circleHalves',
        interval: 200,
    }).start();

    const fileExists = await existsSync(src);
    const relativeSource = src.replace(basePath, '');
    const relativeDest = dst.replace(basePath, '');
    if (fileExists) {
        try {
            await copyFileSync(src, dst);
            spinner.succeed(`${relativeSource} copied ${new Date()}`);
        } catch (e) {
            spinner.fail(`${src} failed to copy`);
            console.log(e)
        }
    } else {
        try {
            await unlinkSync(dst);
            spinner.succeed(`${relativeDest} removed`);
        } catch (e) {
            spinner.fail(`Failed to remove ${relativeDest}`);
            console.log(e)
        }
    }
})();
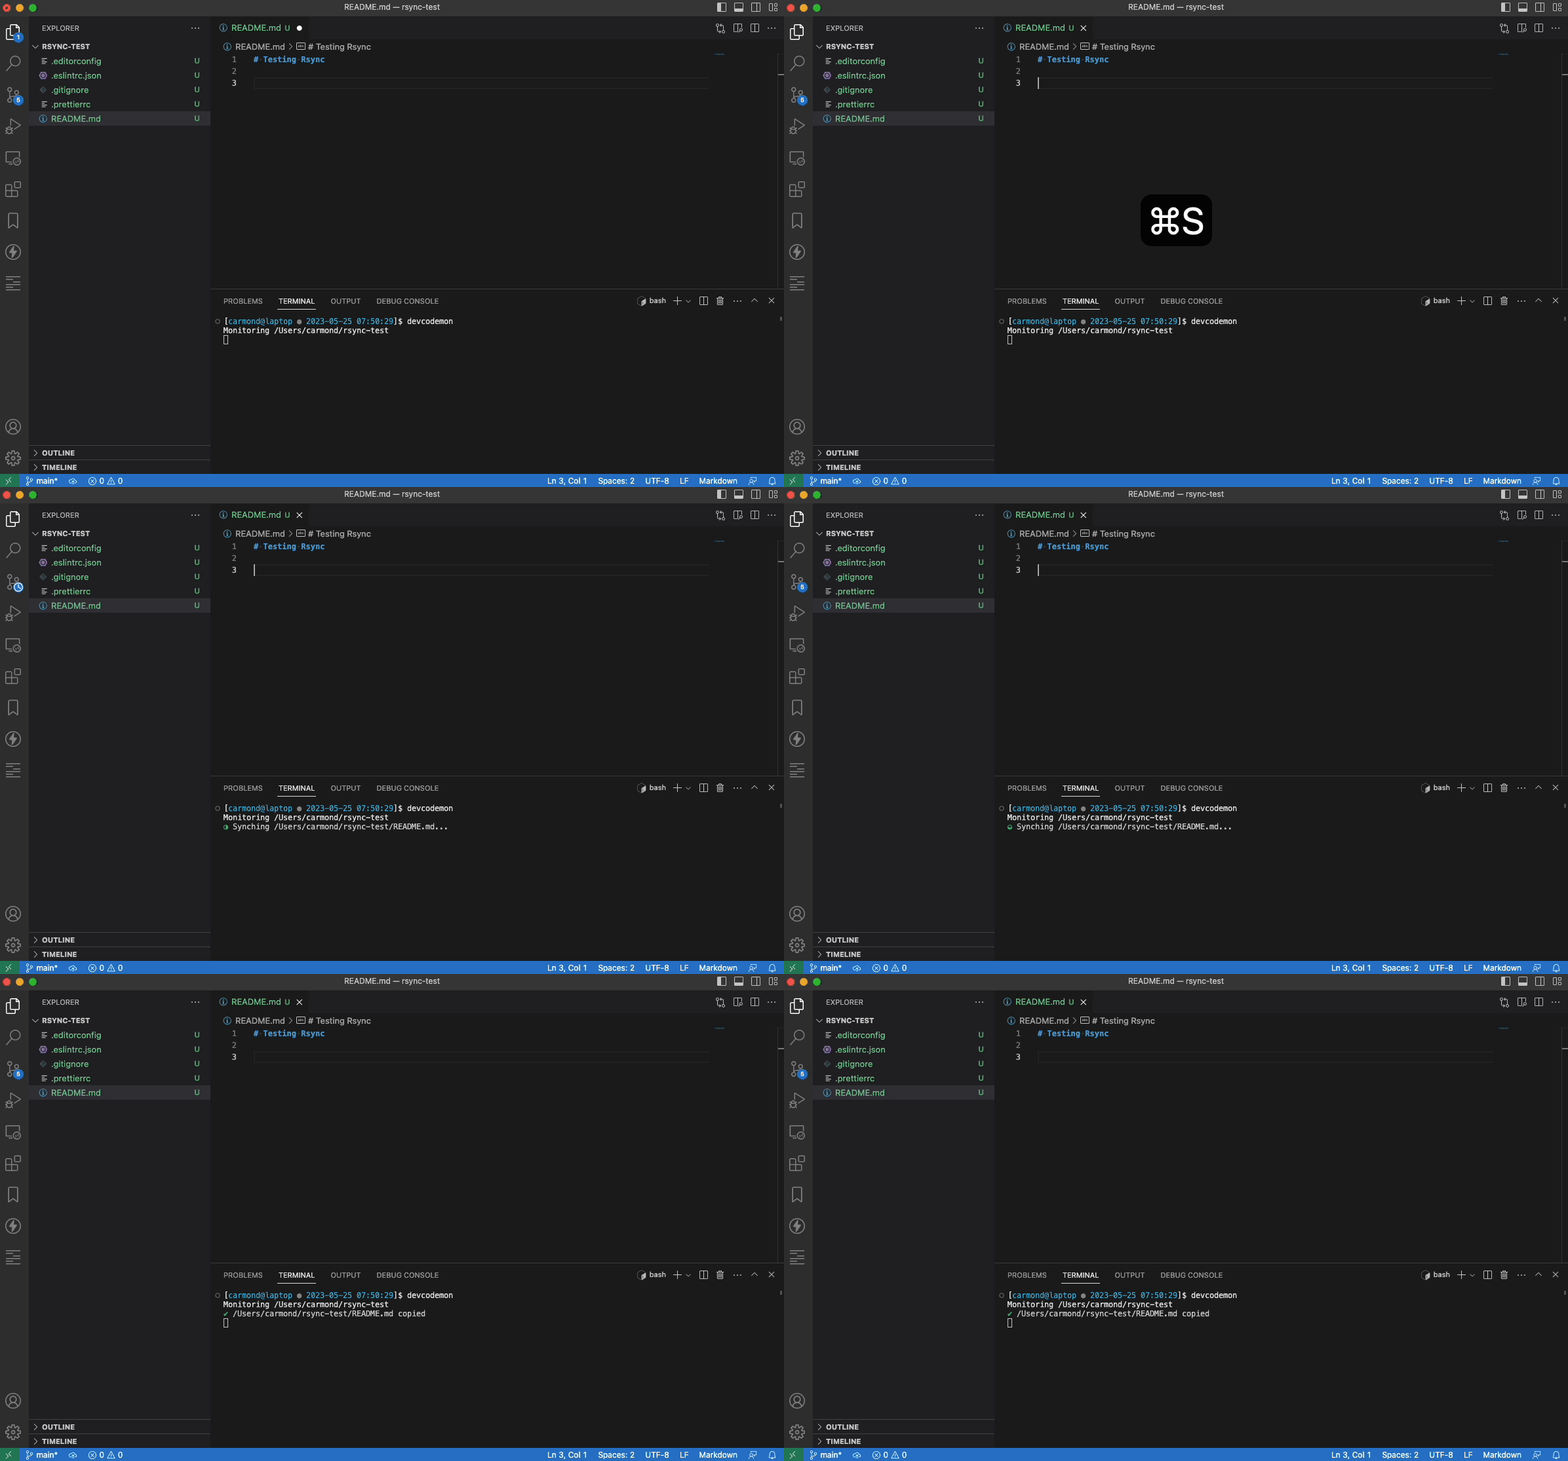
And here is what that looks like in action.

Saving a file

Deleting a file

Tuesday, February 18, 2020

Git Status on Command Line Does Not Match Git Status in VSCode.

A couple of times recently I ran into a situation where VSCode was showing a lot of untracked files in git but the command line was not. Today when I opened up VSCode, it showed over 60 untracked items while the command line only showed 15. It turned out to be a simple misunderstanding on my part.

To demonstrate, I created a new git project with a new subdirectory called new-dir. Inside of new-dir, I created 3 files.

When I run git status on the command line without any parameters, it collapses new directories into single entries.

Command line example

By examining the git output in VSCode, I see now that it is running the command git status -z -u. The -z just terminates each entry in the list with a NUL instead of LF presumably for better parsing. The -u lists out each untracked file individually. And this makes sense because in the source control window of VSCode, you want to be able to see the diff of each file individually.

View of source control panel in VSCode

Monday, April 29, 2019

Make Your Console Statements Stand Out

Using the Chrome DevTools to debug your JavaScript code is great. Breakpoints are a great way to analyze what is going on with your code. But sometimes you just need an old-fashioned console.log. But if you have an app that is already chatty in development mode with a lot of console messages, there is a way to make your console statement stand out. You may not know that you can format your console statements with CSS. For example:
console.log('%cExample', 'background: #a00; color: #fff; font-weight: bold; font-size: 110%');
will look like this in your console:

Example

A better way to do it, though, is to use a JavaScript template literal. For example:
let xyz = 123;
console.log('%c%s', 'background: #a00; color: #fff; font-weight: bold; font-size: 110%', 
  `The value of xyz is ${xyz}`);
Will produce:

The value of xyz is 123

Now to make it even easier, we can create a VS Code snippet:
"color-console": {
 "prefix": "color-console",
 "body": [
  "console.log('%c%s', 'background: #a00; color: #fff; font-weight: bold; font-size: 110%', `$1`);"
 ],
 "description": "Color coded console message"
},
And then voilĂ 

Thursday, January 31, 2019

Using Workspaces

I'm a big fan of Visual Studio Code's workspaces. In the past, I've used them to separate my work into different projects and applications or different parts of an application (like server-side vs client-side). At the moment we are wrapping up a release at my job so I am often jumping between various tickets. It occurred to me this morning that I could create a new workspace for each ticket. The reason this is helpful is because sometimes I may need these 4 files open for one ticket and a different 5 files open for a different ticket. So instead of keeping them all open and jumping around, I can have just the files I need open for that particular ticket to avoid confusion.

So then the thought occurred to me, what if I could do the same with Chrome? Fortunately, there is an extension for that. Now I can open my application and all my reference material in one workspace and a different set of tabs in another workspace.

Simple. Efficient. I like that.

Thursday, June 7, 2018

Using the VS Code Integrated Terminal with Remote Hosts

I am in the process of writing some server-side scripts on a remote server. There are three things that would make it easier:

1. If I could write the code directly to the server from VS Code
2. If the integrated terminal in VS Code would automatically log me into that server
3. If I could easily toggle between the code window and the terminal window

I am going to describe how to do all of those things.

Writing Code Directly to the Server in VS Code

To write code directly to the server, I am using an SFTP extension I found in the VS Code Marketplace. The extension I am using is simply called sftp.

To configure it, you open the command palette (Cmd+Shift+P) and select SFTP: Config. This will generate a file called sftp.json within the .vscode directory of your workspace. You can check out the full config options, but basically you just need to specify the host, username, and remote path. So that my code is automatically saved to the server, I set the uploadOnSave option to true in the sftp.json file.

And so that I don't have to log in every time, I am using the privateKeyPath option as well. I won't go into the details here of how to set up SSH for auto login without a password but it is definitely a time saver.


Automatically Logging into the Remote Server

The next thing I wanted to accomplish was automatically logging into the remote server in the integrated terminal. To do that I need to update my workspace settings.

To start I select Code ▶ Preferences ▶ Settings to open the Workspace Settings. Then within the settings, I add some JSON to tell it to call the ssh command with an argument of the server name.


Also, because I like to color code my terminal windows, I found the workbench.colorCustomizations setting which allows me to set a value for terminal.background.

For this change to take effect, I have to restart VS Code. A security feature prompts me to make sure this is what I really want to do. This only happens the first time.


I have to restart VS Code one more time. This time when I open the terminal, it automatically logs me into the remote server so that I can test my scripts.

Toggling Between the Code Window and the Terminal Window

While I like having the terminal window integrated into my IDE, I don't like having to use the mouse to click back and forth between the two windows. Fortunately, someone on Stack Overflow had already solved that problem.

This time I go to Code ▶ Preferences ▶ Keyboard Shortcuts. To make the change, I first have to click on the keybindings.json link:


Then I can paste in the code for my settings.


Now after I save my code, I simply press Ctrl+` to switch to the terminal window, test my code, and then press Ctrl+` again to return back to my code.

 
Blogger Templates